About Smart Life (3)
A step by step guide on how to pair your phone to the wifi interconnect smoke detector via Tuya Smart app.
This guide describes the steps to pair your wifi interconnect smoke detector with your mobile phone via Tuya Smart App. Please follow them closely.
You will need the following:
- to be at your installation location with your WiFi enabled to do the pairing.
- the wifi interconnect smoke detector (it has 2 parts, the smoke detector and the wifi base).
- your mobile phone (Android or Apple)
- Tuya Smart App
- patience!
We recommend you to read through the guide first to get a brief understanding before commencing the pairing. Please pay attention to the parts with this icon and bold in red.
We also have a video for your reference. You can scroll slightly down to refer to the text guide version.
Step-By-Step Guide
- Download & install the app TUYA SMART onto your mobile phone. Follow the instructions in the app to setup your account / profile.
- Remove the wifi interconnect smoke detector set from the box. There are 2 parts, the actual smoke detector and the wifi base.
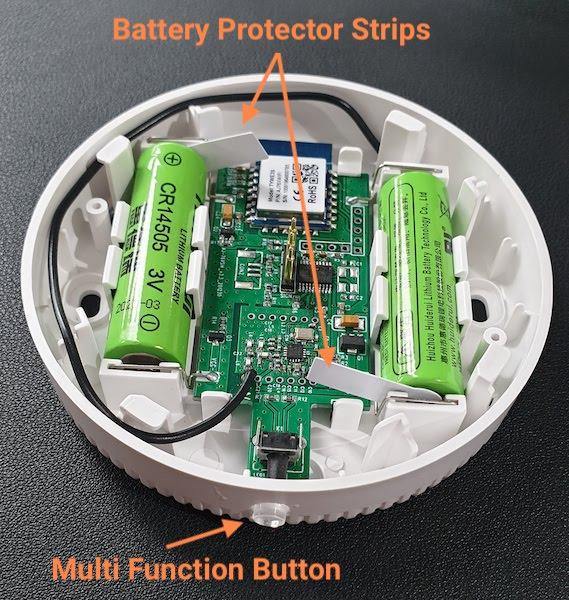
- The wifi base comes pre-installed with 2 AA CR14505 batteries. Remove the white battery protector strips by pulling them out. This powers up the wifi base.
- Mount the smoke detector into the wifi base by turning clockwise and wait for a minute.
- Press & hold the multi function button on the wifi base. Release the multi function button after 5 red flashes. You should see the button continuously flashing red now. If not, repeat Step 4.
IMPORTANT: multi function button to be released only after 5 red flashes. If released earlier, it will reset the pairing of this wifi interconnect smoke detectors with other interconnect smoke detectors that we had paired for you prior to delivery to you. In this case, you will also need to re-pair this wifi interconnect smoke detector back into the cluster. - Return to app TUYA SMART and select Home.
- Click
 to add a new device.
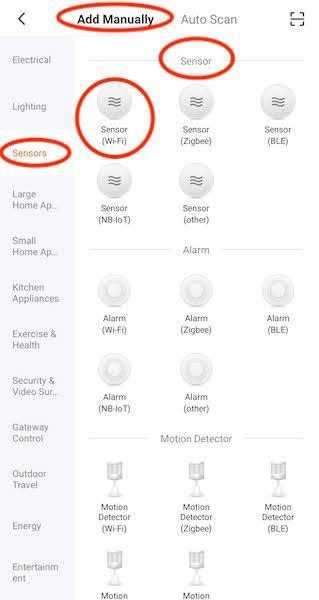
 - Select Add Manually.
- Go to category Sensors.
- Select Sensor (Wi-Fi) under Sensor category,
- Your Wi-Fi SSID (Wi-Fi name) should auto show up. Enter your Wi-Fi password and click Next.
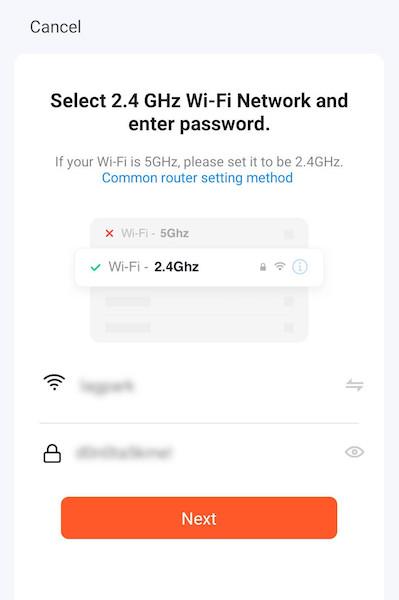
IMPORTANT:- Please note that you must connect to the 2.4GHz Wi-Fi network or the pairing will fail.
- Most modern routers will have both 5GHz and 2.4GHz Wi-Fi networks. It is highly recommended to have different Wi-Fi names for both networks so that you can accurately choose the 2.4GHz Wi-Fi network name. Please consult your router manual on how to give different Wi-Fi names.
- If your router auto combines the 5GHz and 2,4GHz Wi-Fi networks together as a single Wi-Fi name, you may not be to pair successfully.
- This is a limitation of today’s Wi-Fi technologies with TUYA SMART and not a limitation of our smoke detector.
- You should see the multi function button light blinking red quickly.
Select Blink Quickly.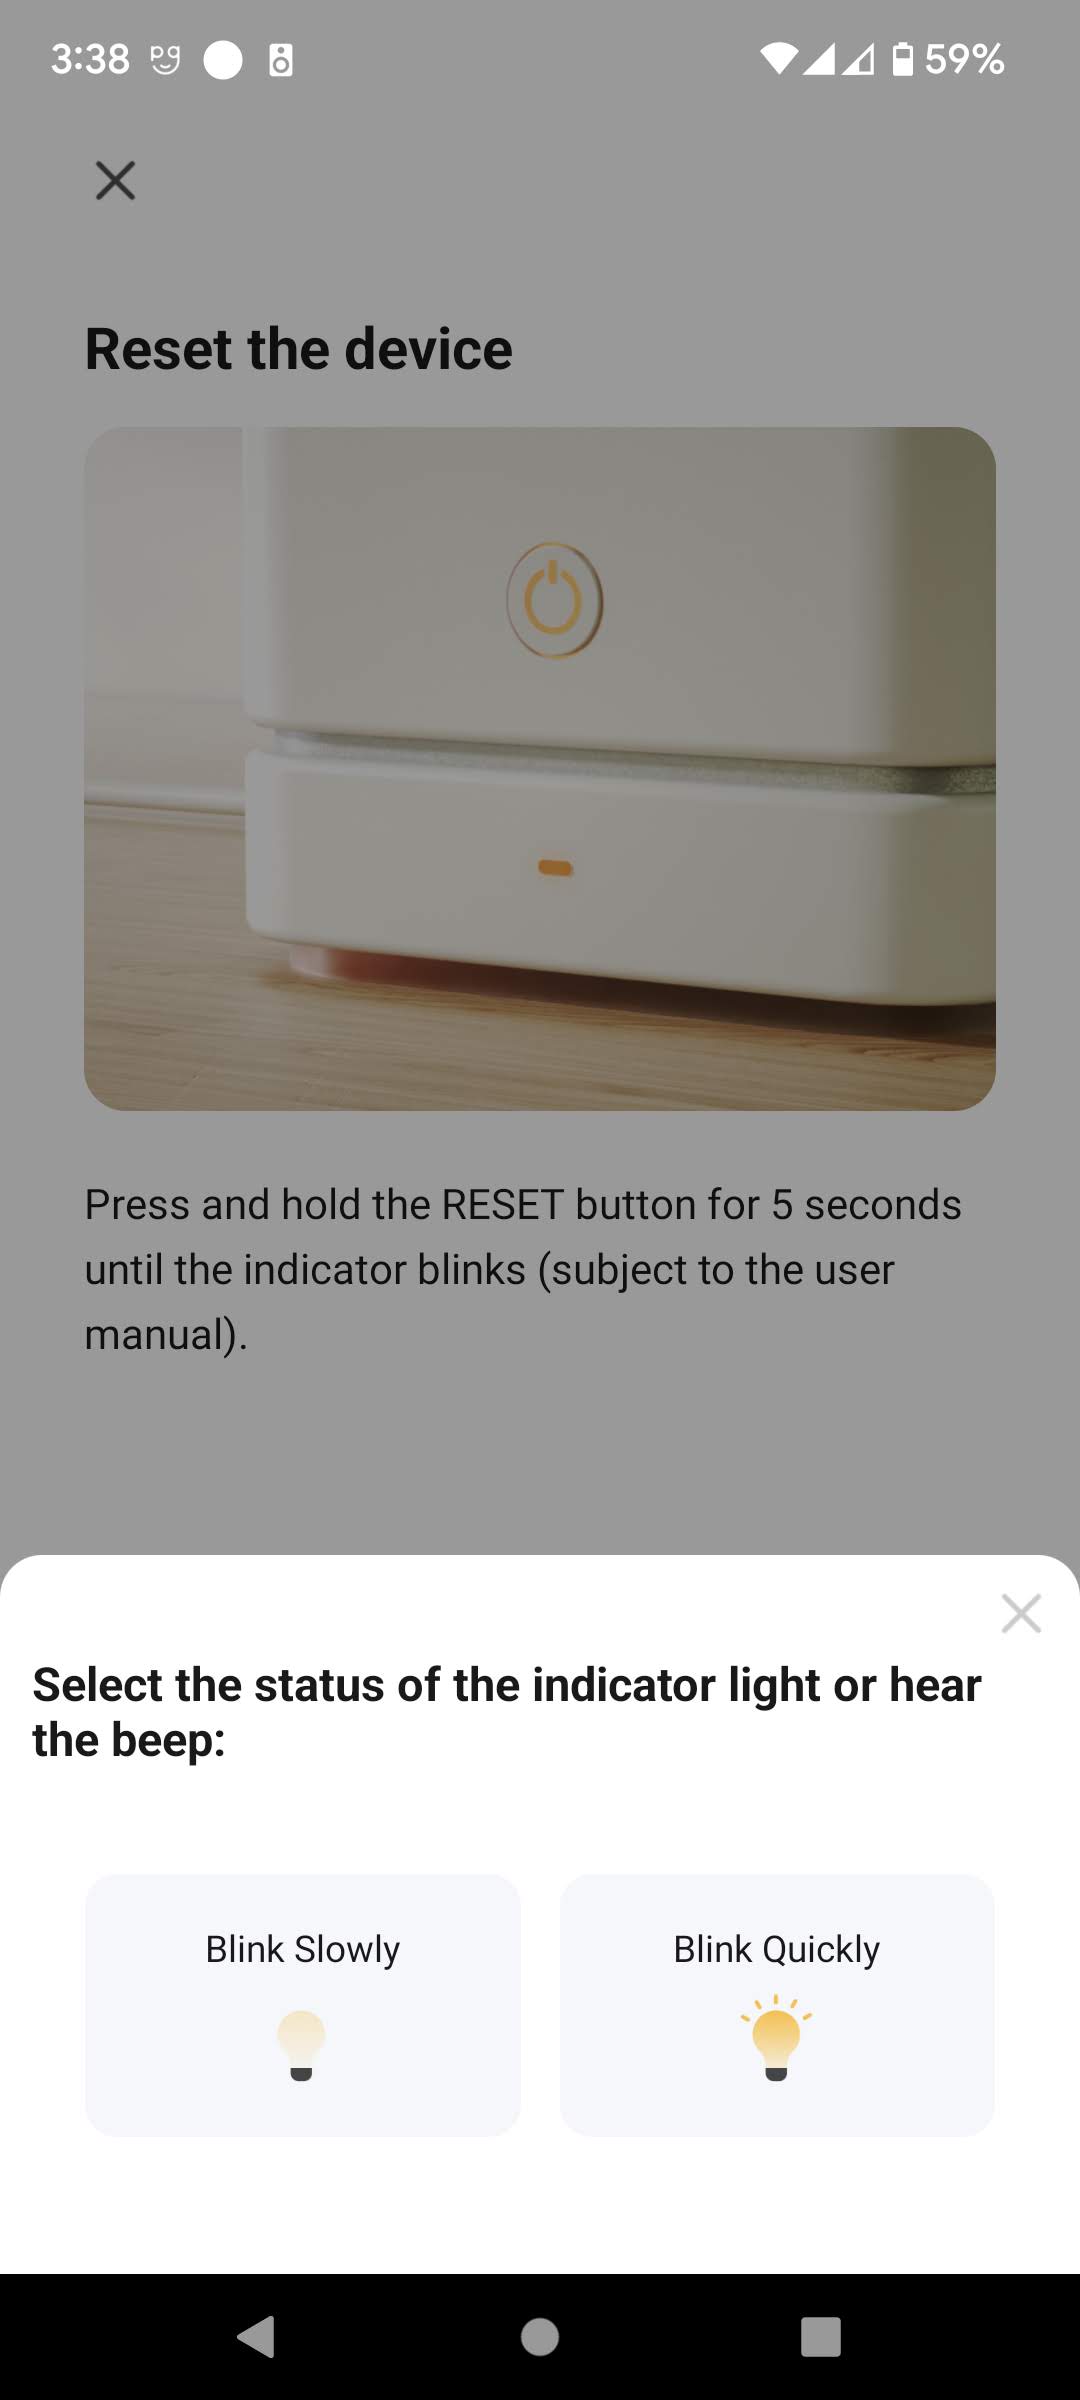
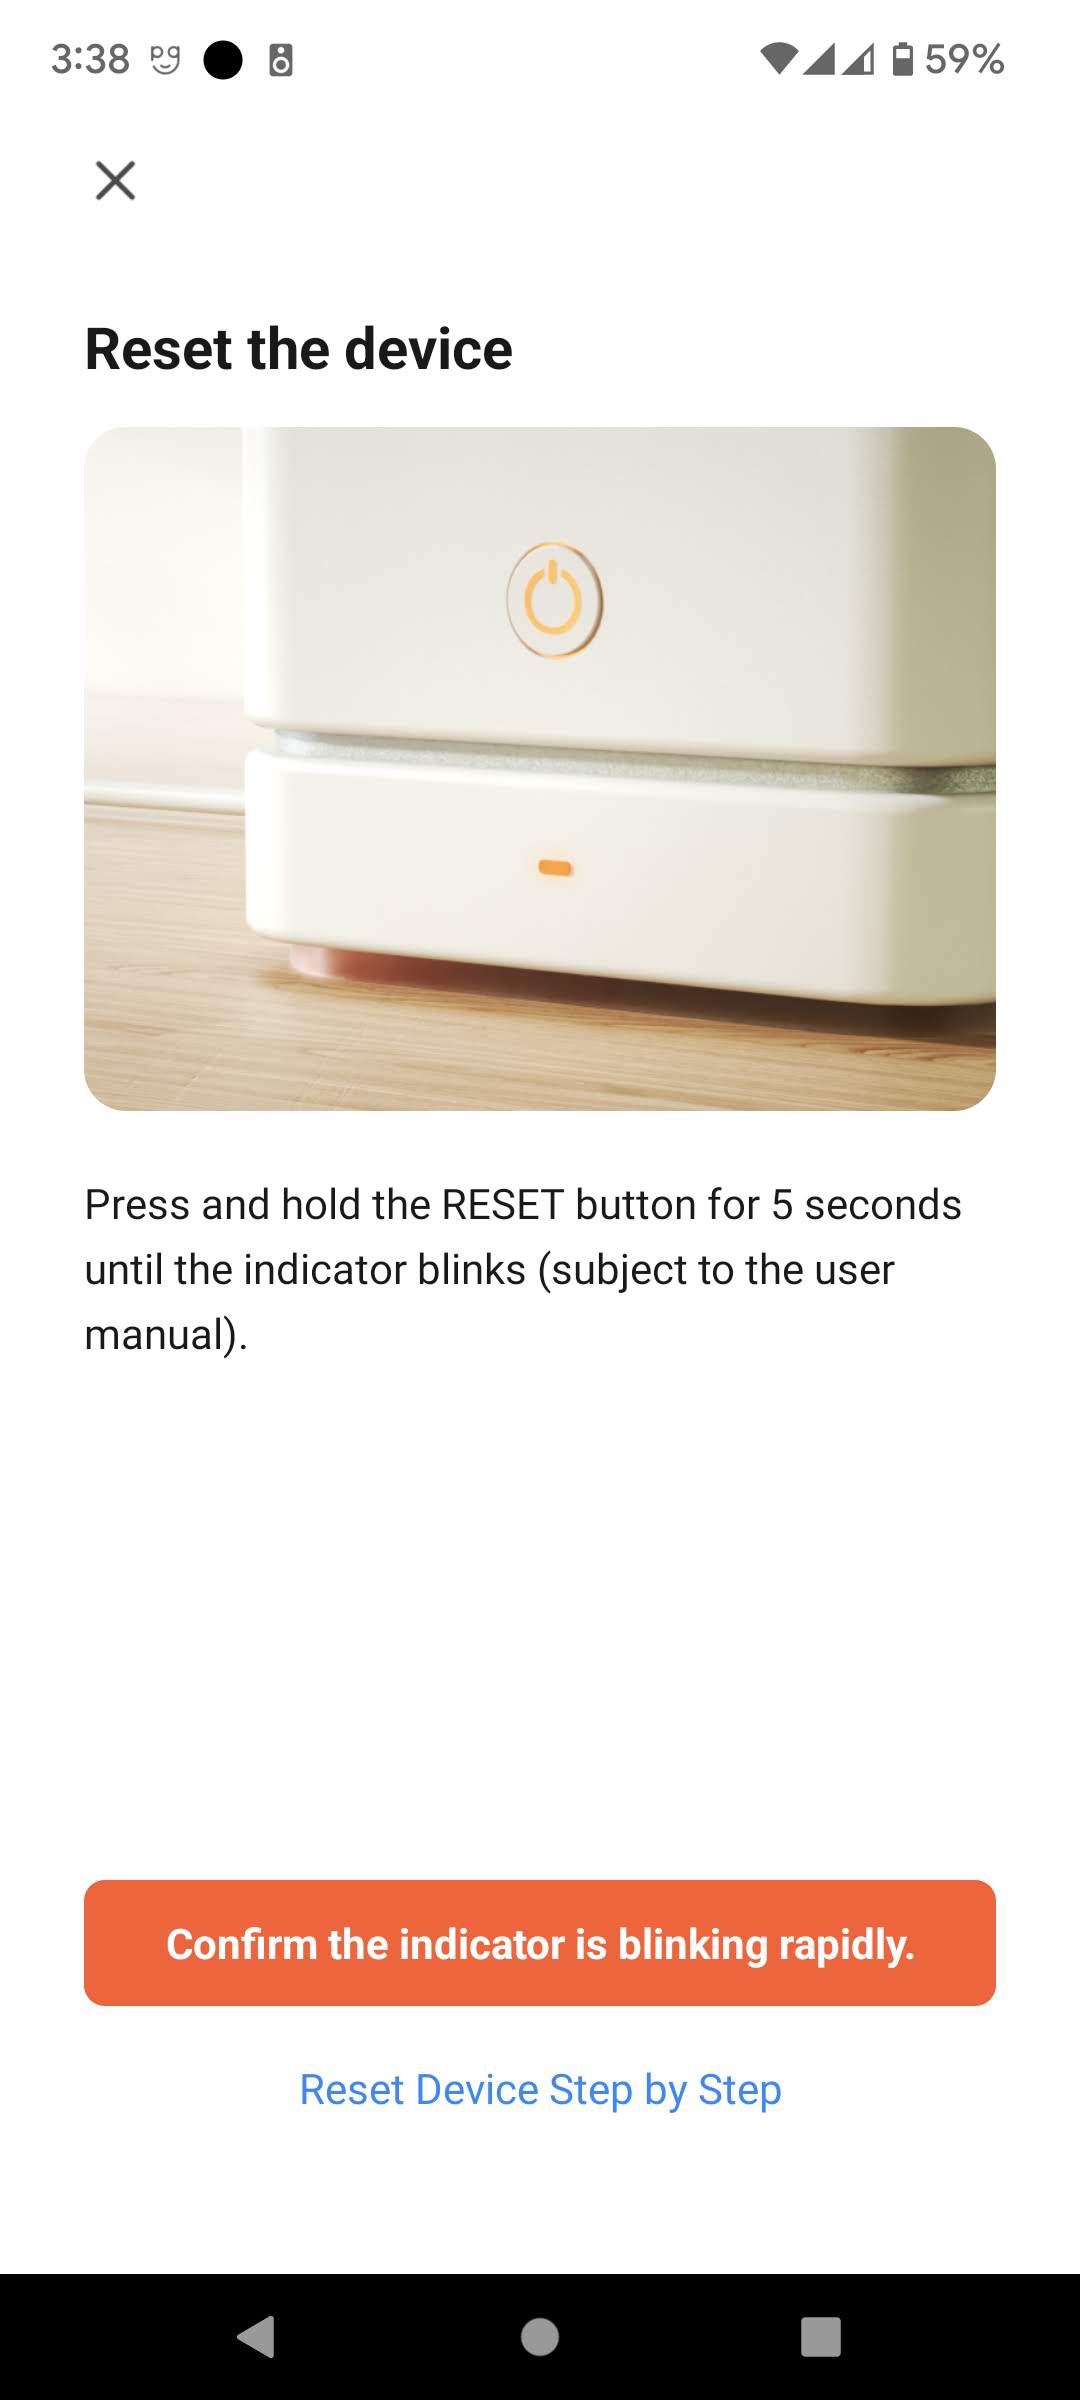
- Click Confirm the indicator is blinking rapidly.
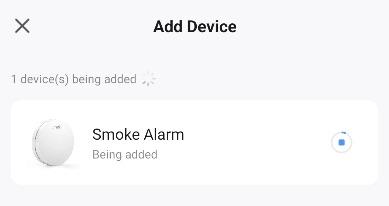
- Pairing initiates. Be patient. It may take more than ONE minute for the pairing.
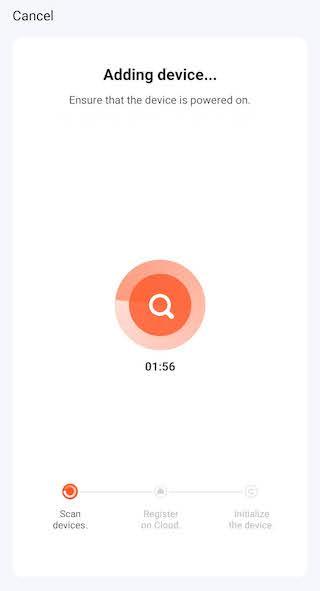
You will see the progress bar moving towards the end of successful pairing.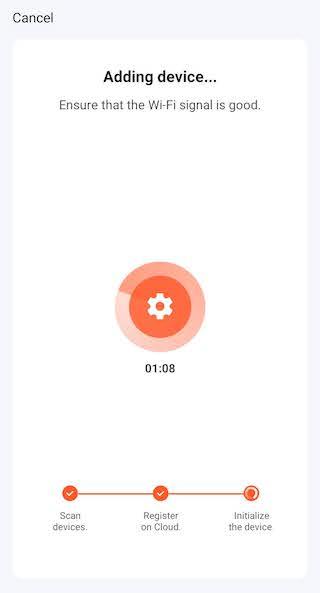
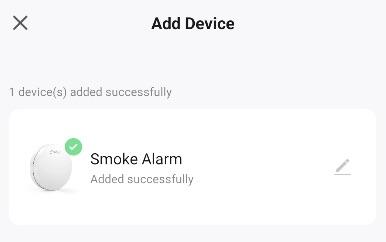
- You will see the following screen if pairing is successful.
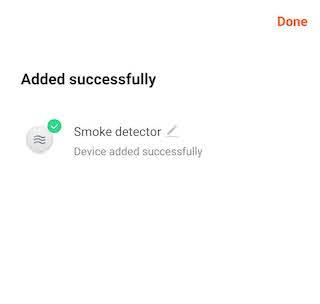
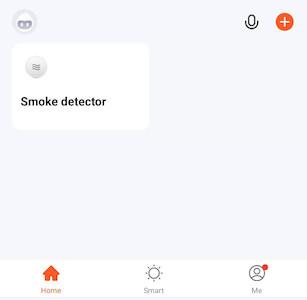
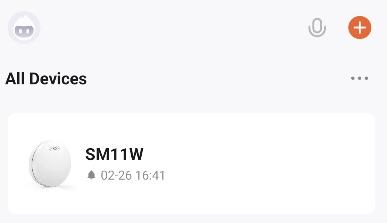
- Click Done to complete the process. You will be returned to app home screen. You should now see your paired wifi interconnect smoke detector in the home screen.
If Pairing Fails
- repeat step 3 to step 14
- ensure the button at the wifi base is flashing red continuously after you released multi function button after 5 red flashes
- ensure the Wi-Fi network you are using to do pairing is on your 2.4GHz Wi-Fi network
What happens when your wifi interconnect smoke detector is triggered on smoke detection?
Your wifi interconnect smoke detector should display like this in standby mode.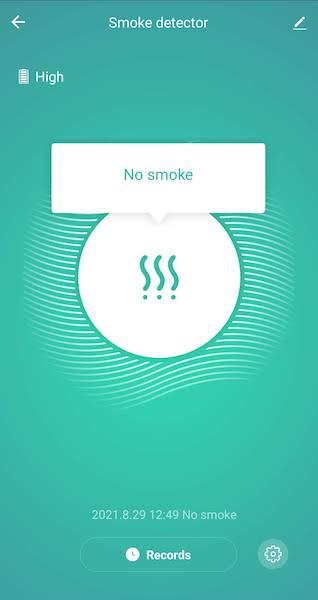
When your wifi interconnect smoke detector detects smoke and enters alarm mode, you will receive an alert on your Tuya Smart app.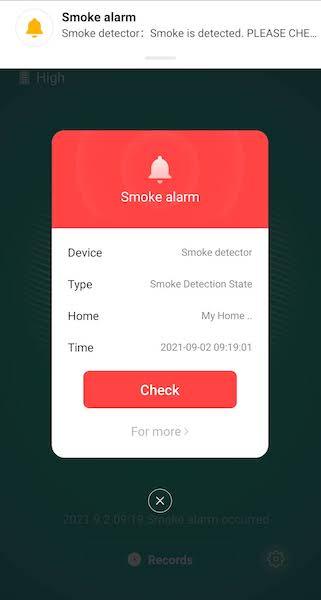
Clicking on Check will bring you to the wifi interconnect smoke detector view.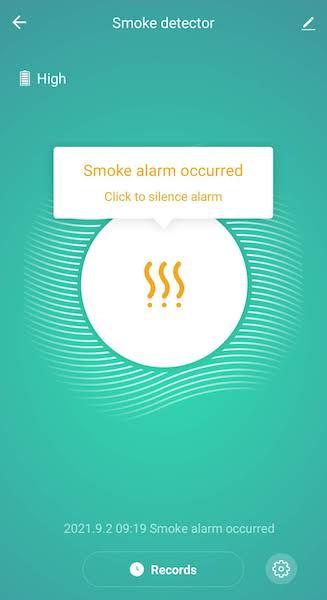
You can check on past alarm records via the Records button at bottom of above view.
A step by step guide on how to pair your phone to the SM11W wifi smoke alarm via Smart Life app.
This guide describes the steps to pair your wifi smoke alarm (SM11W) with your mobile phone via Smart Life App. Please follow them closely.
You will need the following:
- to be at your installation location with your WiFi enabled to do the pairing
- the wifi smoke alarm SM11W
- your mobile phone (Android or Apple)
- Smart Life App
- patience!
We recommend you to read through the guide first to get a brief understanding before commencing the pairing. Please pay attention to the parts with this icon and bold in red.
We also have a video for your reference. You can scroll slightly down to refer to the text guide version.
Step-By-Step Guide
- Download & install the app SMART LIFE onto your mobile phone. Follow the instructions in the app to setup your account / profile.
- Ensure your mobile phone is connected to your home WiFi and with Bluetooth enabled / turned on.
- Press & hold the surface of smoke alarm (also the test/silence button) for about 10 seconds. You should hear a loud beep and see a single red LED flash. If you didn’t hear / see, repeat this step.
- Press the test/silence button 4 times quickly to enter pairing. You should see the red LED blinking continuously (the LED will turn to flashing green after a while).
- Return to app SMART LIFE and select Home.
- Click to add a new device.
- Select Add Device.
- Go to category Sensors.
- Select Sensor (Wi-Fi) under Sensor category,
- Your Wi-Fi SSID (Wi-Fi name) should auto show up. Enter your Wi-Fi password and click Next.
IMPORTANT:- Please note that you must connect to the 2.4GHz Wi-Fi network or the pairing will fail.
- Most modern routers will have both 5GHz and 2.4GHz Wi-Fi networks. It is highly recommended to have different Wi-Fi names for both networks so that you can accurately choose the 2.4GHz Wi-Fi network name. Please consult your router manual on how to give different Wi-Fi names.
- If your router auto combines the 5GHz and 2,4GHz Wi-Fi networks together as a single Wi-Fi name, you may not be to pair successfully.
- This is a limitation of today’s Wi-Fi technologies with SMART LIFE and not a limitation of our smoke detector.
- You should see the LED blinking green quickly by now.
- Select Blink Quickly.
- Click Confirm the indicator is blinking rapidly.
- Pairing initiates. Be patient. It may take more than ONE minute for the pairing.
- You will see the following screen if pairing is successful.
- You will be returned to app home screen. You should now see your paired wifi smoke alarm in the home screen.
If Pairing Fails
- repeat step 4 to step 15
- ensure the Wi-Fi network you are using to do pairing is on your 2.4GHz Wi-Fi network